WordPress is a powerful content management system, but it can encounter performance issues due to excessive autoloaded options.
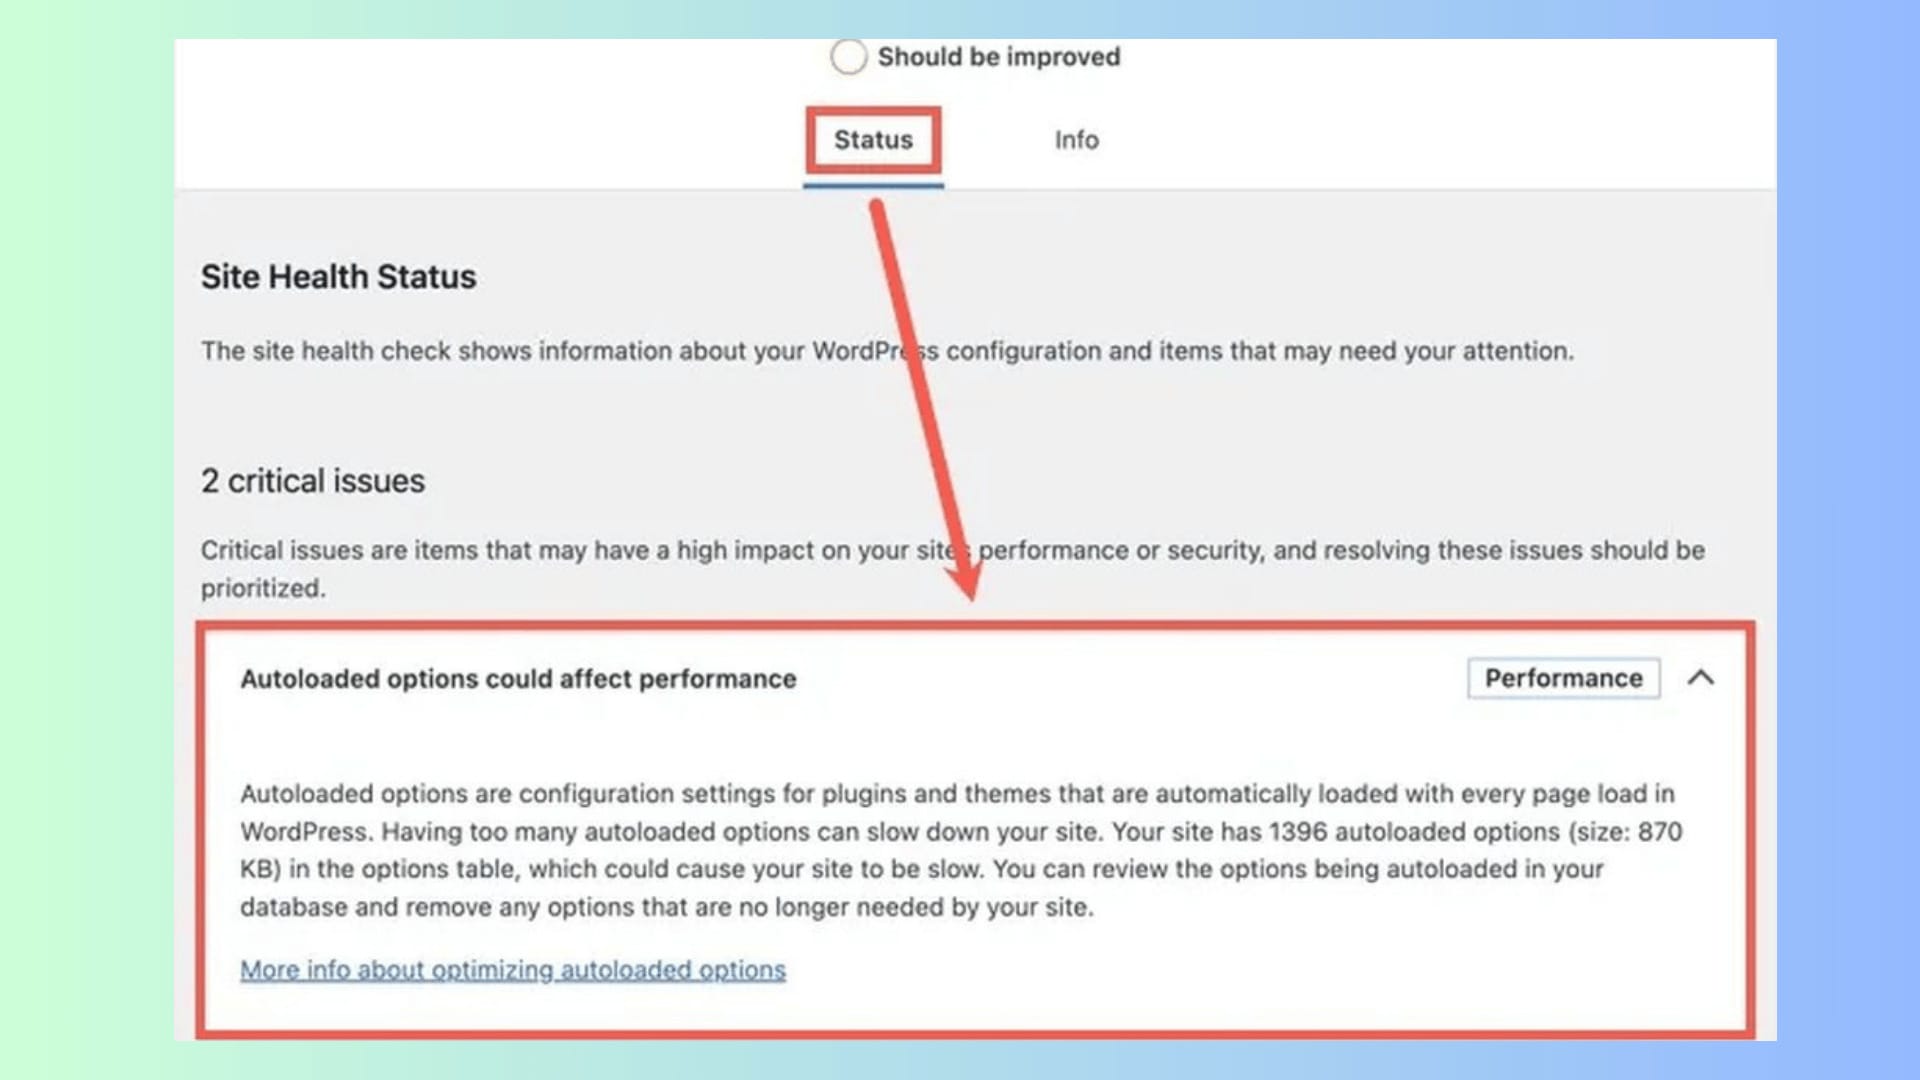
Autoloaded options error WordPress can be caused if there are too many stored in the wp_options table and are loaded on every page request if marked as “yes.”
Key Takeaways
- Regularly audit and manage the
wp_optionstable to keep your site fast and responsive. - Utilize plugins and SQL queries to identify and clean up autoloaded data.
- Only autoload essential options, and set others to ‘no’ to prevent them from loading unnecessarily.
- Perform regular database maintenance to keep your WordPress installation optimized and efficient.
While this makes data retrieval faster for some features, it can also lead to slow site performance when too many options are autoloaded, causing database bloat.
Addressing these unnecessary autoloaded options can significantly improve your website’s health, reducing server load and improving page speed.
This guide will cover effective solutions to fix the autoloaded options issue in WordPress, ensuring your site runs smoothly.
Understanding the wp_options Table
The wp_options table in WordPress is essential for storing various settings, configurations, and plugin data.
However, when not managed correctly, it can accumulate unnecessary data, leading to performance issues.
Autoloaded data in this table is loaded on every page request, so keeping this optimized is crucial for site performance.
Identifying Autoloaded Options
1. Use SQL Queries to Identify Autoloaded Options
To see which options are autoloaded, use the following query:
SELECT option_name, option_value FROM wp_options WHERE autoload = 'yes';This query retrieves all autoloaded options, allowing you to analyze and identify any unnecessary data that might be slowing down your website.
2. Check Autoload Data Size
It’s also possible to check the size of your autoloaded data. A large size (e.g., over 1MB) can indicate a need for cleanup:
SELECT 'autoloaded data in KiB' as name, ROUND(SUM(LENGTH(option_value))/ 1024) as value FROM wp_options WHERE autoload='yes' UNION SELECT 'autoloaded data count', count(*) FROM wp_options WHERE autoload='yes';3. Top Items in Autoloaded data
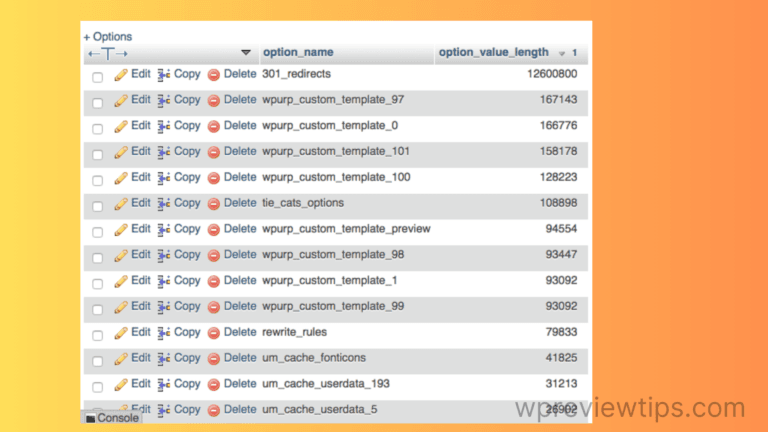
It’s useful to know the top 20 items of big size data that is being autoloaded. It could be remnants of deleted or uninstalled plugins or themes. Some could be useful too. If you do a careful check of the results, you can set autoload to “no”.
I was able to reduce the size of autoload options to less than 800KB using this query below. For some other sites, I was able to reduce from 4MB to minimal. It will remove the pertaining error.
SELECT option_name, length(option_value) FROM wp_options WHERE autoload='yes' ORDER BY length(option_value) DESC LIMIT 20;Example Scenario: Reducing Autoload Data Size
If your autoload data exceeds 1MB, it’s time to optimize. For example, a website’s performance was significantly improved by reducing autoload data from 1.5MB to 300KB by following these steps:
- Identify unnecessary autoloaded options using the SQL queries provided earlier.
- Disable autoload for non-critical settings.
- Remove orphaned data using database cleaner plugins.
- Optimize tables with WP-Optimize to ensure no leftover data affects performance.
SQL Optimization Commands for Immediate Fixes
1. Bulk Disable Autoload for Multiple Entries
UPDATE wp_options SET autoload = 'no' WHERE option_name LIKE 'unwanted_%';This command disables autoload for all entries starting with ‘unwanted_’. It’s a quick way to bulk edit your autoload settings.
2. Clean Up Expired Transients
DELETE FROM wp_options WHERE option_name LIKE '_transient_%' AND option_value < NOW();Removing expired transients helps in reducing unnecessary data clutter in your wp_options table.
Solution 1: Identify and Clean Up Unnecessary Autoloaded Options
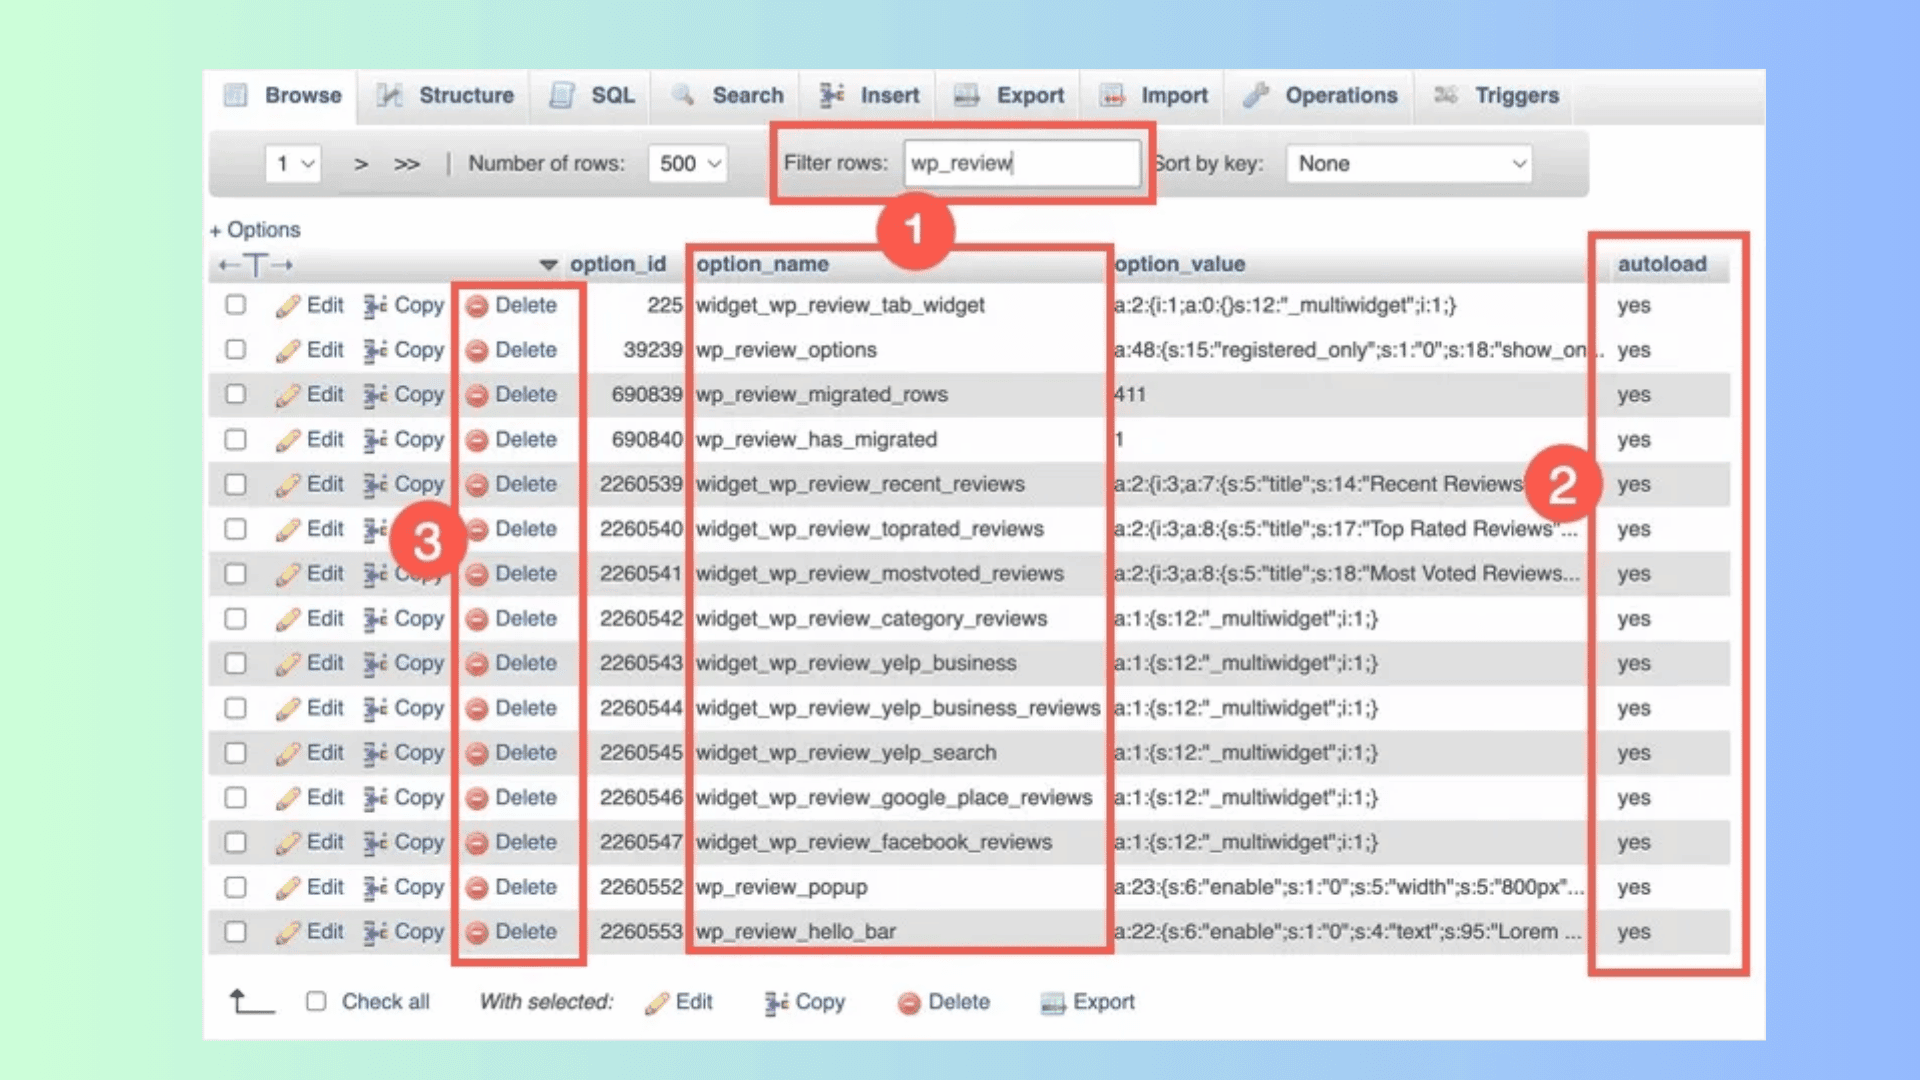
One of the first steps to address this issue is identifying which options are unnecessarily autoloaded and cleaning them up. Tools like phpMyAdmin or WP-CLI can help in querying the wp_options table.
Steps:
- Access your WordPress database using phpMyAdmin or WP-CLI.
- Run the following SQL query:
SELECT option_name, option_value FROM wp_options WHERE autoload = 'yes';- Identify entries that are no longer needed, especially those added by old or inactive plugins.
- Delete these entries or set their autoload value to “no”:
UPDATE wp_options SET autoload = 'no' WHERE option_name = 'your_option_name';This manual cleanup helps to declutter your database and can improve your site’s load time by reducing the data loaded on every request.
Solution 2: Disable Autoload for Unnecessary Options Using a Plugin
Not everyone is comfortable running database queries, so using a plugin is a safer alternative. Plugins like Advanced Database Cleaner or WP Optimize can assist in managing autoloaded options without touching code.
Steps:
- Install and activate the Advanced Database Cleaner plugin.
- Navigate to the “Autoloaded Data” section.
- Review the list of autoloaded options. The plugin typically highlights options that may be excessive or unused.
- Disable or remove unnecessary options to prevent them from loading automatically.
Using a plugin minimizes the risk of accidental deletions and provides a user-friendly interface to manage your database.
User Quote:
“Advanced Database Cleaner helped me pinpoint which autoloaded options were causing my site to lag. I was able to clean it up in minutes without needing to use SQL commands.”
Solution 3: Optimize Your Database Regularly-Autoloaded Options Error WordPress
Database optimization isn’t a one-time task; regular maintenance can prevent autoload issues from accumulating. You can schedule regular cleanups using optimization plugins.
Steps:
- Install WP-Optimize.
- Go to the plugin settings and enable database optimization.
- Set a schedule (e.g., weekly or monthly) to clean your database, including removing expired transients and orphaned autoloaded options.
- The plugin will optimize the tables and delete unwanted data, ensuring your database remains efficient.
This proactive approach ensures that your site continues to run smoothly without any slowdowns due to database bloat.
User Quote:
“Setting up WP-Optimize to regularly clean my database was a game-changer. It’s automated and takes the hassle out of maintaining performance.”
Solution 4: Update or Remove Outdated Plugins and Themes
Often, autoloaded options are added by plugins and themes. Over time, these can accumulate and affect performance. Ensuring your plugins and themes are up-to-date, or removing inactive ones, can help reduce unnecessary autoloaded options.
Steps:
- Review your installed plugins and themes.
- Deactivate and delete any that you are not using.
- Ensure that the active ones are updated to the latest versions, as developers may have already optimized their use of autoloaded options.
User Quote:
“I had numerous outdated plugins that were clogging up my database. After removing them, my website’s performance improved drastically.”
Solution 5: Limit the Use of Autoloaded Options Programmatically
For advanced users, limiting the use of autoloaded options can be done programmatically. By modifying plugin or theme code, you can ensure that data is only loaded when required.
Steps:
- Identify plugins or themes that excessively use autoloaded options.
- Modify their code to set
autoload = nowhere it’s not necessary to load the option on every page request.
add_option('my_custom_option', 'value', '', 'no');- Alternatively, consult with the plugin developers to address the issue.
User Quote:
“I noticed one of my plugins was adding a lot of autoloaded options. After setting them to autoload = ‘no,’ my site speed improved by over 30%.”
Best Practices for Autoloaded Data
1. Limit Autoload to Essentials
Only allow essential settings and configurations to be autoloaded. Non-critical settings should be set to no for autoload to reduce unnecessary data processing during page loads.
2. Regular Database Maintenance
Perform regular database maintenance, including optimizing tables and clearing out transient or expired data. Regular cleanups help prevent database bloat and ensure smooth site operation.
Conclusion
Managing autoloaded options is crucial for maintaining a healthy and fast WordPress site.
By following the solutions mentioned above, you can effectively reduce database bloat, optimize server performance, and enhance the overall user experience.
Whether you choose to manually clean up entries, use a plugin, or limit the autoloading programmatically, regular monitoring and maintenance are essential for long-term success.
Addressing this issue not only improves your site’s health but also ensures a smoother, faster, and more efficient WordPress experience.

