To install WordPress you either need a script or do it manually. DreamHost is a hosting company which provides tools for creating a website. Most of the companies do provide cPanel which is a traditional method for database, email, ssl, script and other installations.
But, DreamHost control panel is different from other hosting companies. It has a unique interface that needs a learning curve for beginners to do various website tasks. One of them is to install WordPress on a shared hosting plan.
Though the steps are straight forward, you need to find the right settings and follow the order for WordPress installation on your domain. Otherwise, you may face typical challenges while working with your dashboard.
In this Dreamhost install wordpress review, we are going to see the latest visuals and steps.
How to Add Domain to DreamHost ?
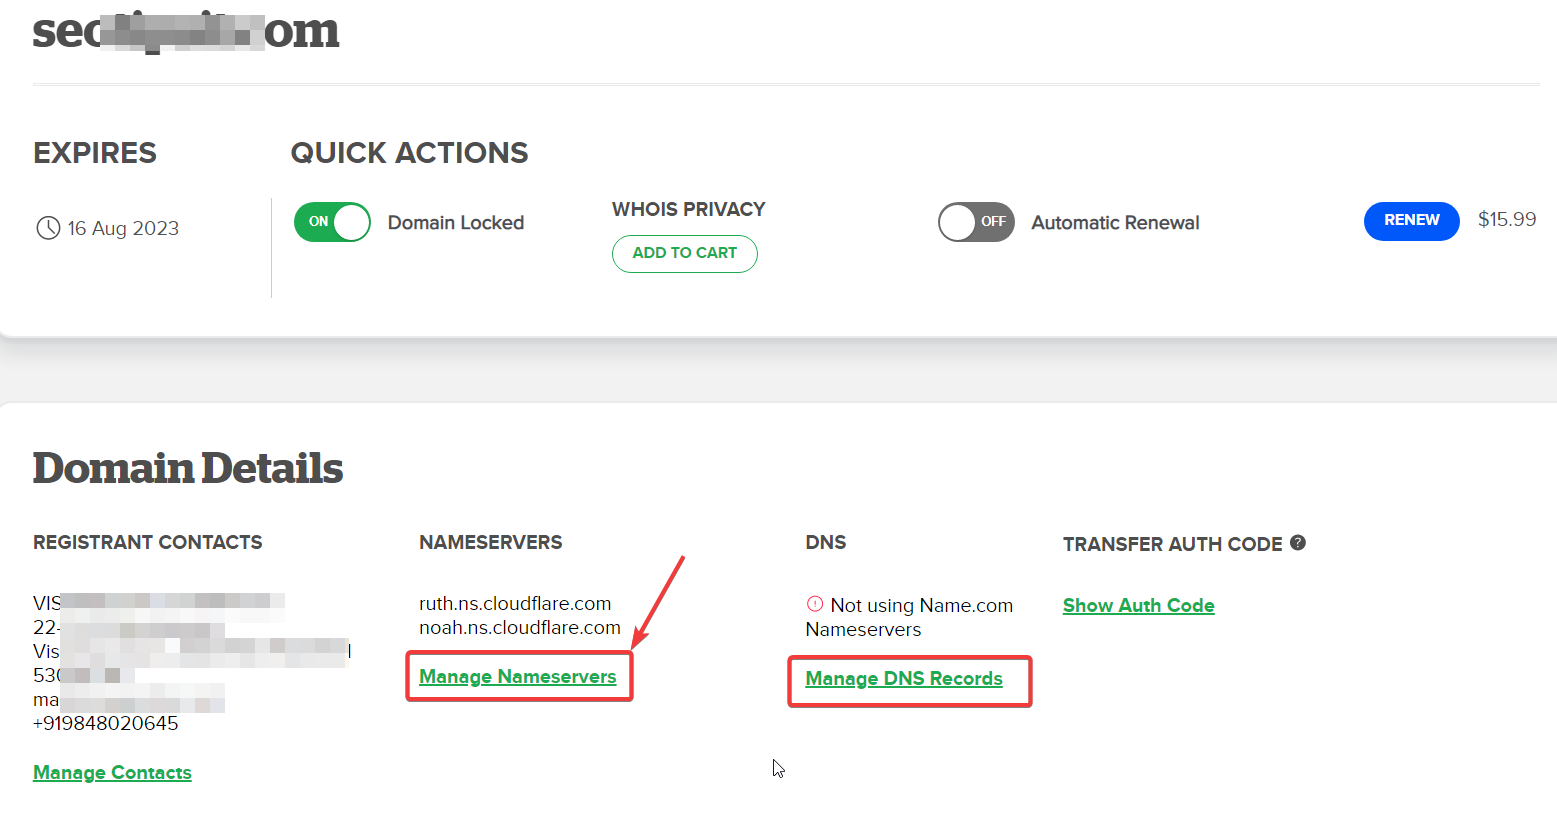
Before you install WordPress on a domain, you need to add the shared hosting plan to the domain. In simple terms, you are adding the domain in the DreamHost panel. Before that you need to add the Dreamhost nameserver (DNS) records to the domain. It is done in the domain registrar panel.
Typically these will be like this
- NS1X.DREAMXXXX.COM
- NS2X.DREAMXXXX.COM
- NS3X.DREAMXXXX.COM
It will take 20minutes to 4hours for the DNS records to propagate. It means that your domain is added to DreamHost.

How to Add Hosting to a DreamHost Domain/Sub-domain?
After the above process, you need to add your shared hosting or VPS hosting to the domain.
- Login to your DreamHost control panel using the login credentials.
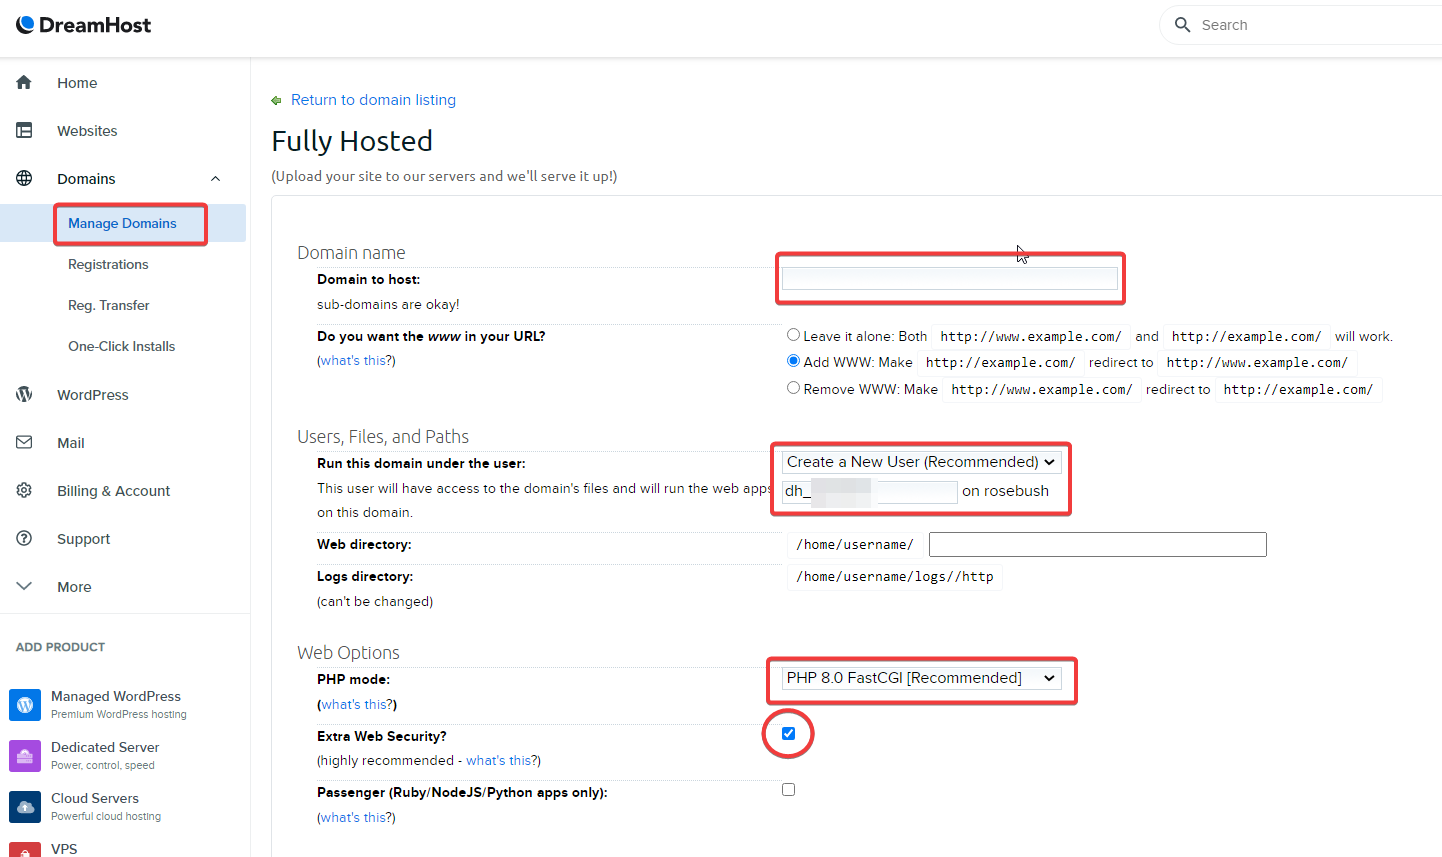
- Domains > Manage Domains.
- Click the blue button “Add Hosting to a Domain/Sub-domain”.
- Fully host the domain using these settings.
- Domain name
- Users, Files and Paths
- Web options
- Visual confirmation
- Click the Fully host this domain blue button.

It will add the DreamHost hosting to the domain.
There are additional features you can add in this screen. You can see in this tutorial.
How to Install WordPress Automatically in DreamHost?
There are two options here, which take you to the same setting.
- Domains > One-click Installs
- WordPress > One-click installs
On the right hand-side you can see the label, Install a New Application.
- Click on Learn More & Install.

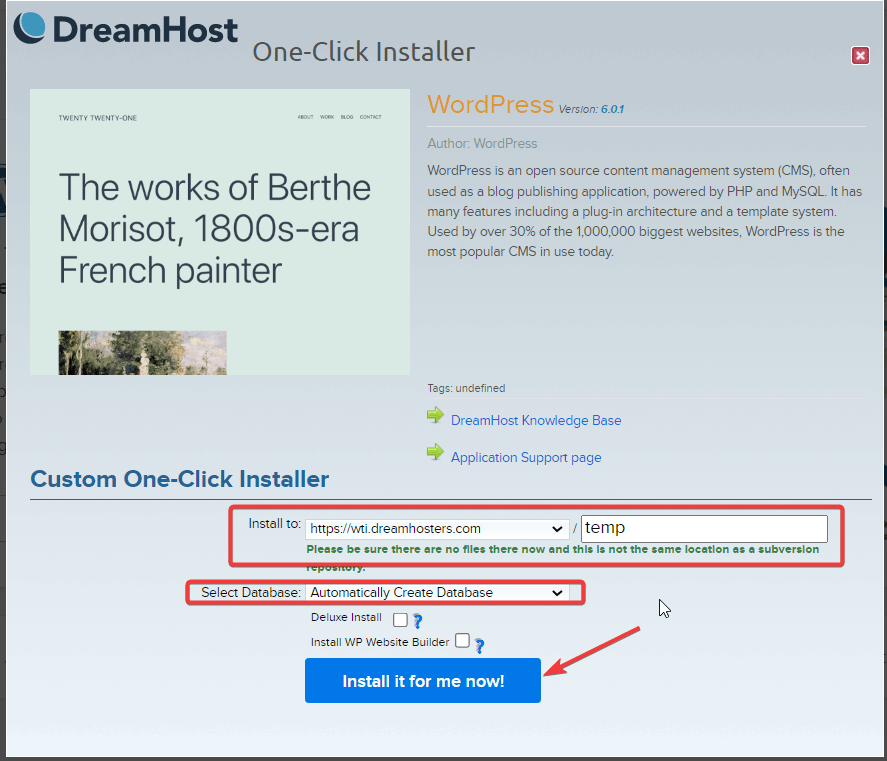
- Dreamhost custom one-click installer will open.
- There are two options.
- Install to – Select a domain – You should select the domain which you previously added fully hosting.
- Select Database – Automatically create a database – Keep this option as it is.

- Untick the following options
- Delux Install
- Install WP Site Builder – It is only necessary if you want a WordPress site page builder kind of thing. But for simple theme installation, it is not necessary.
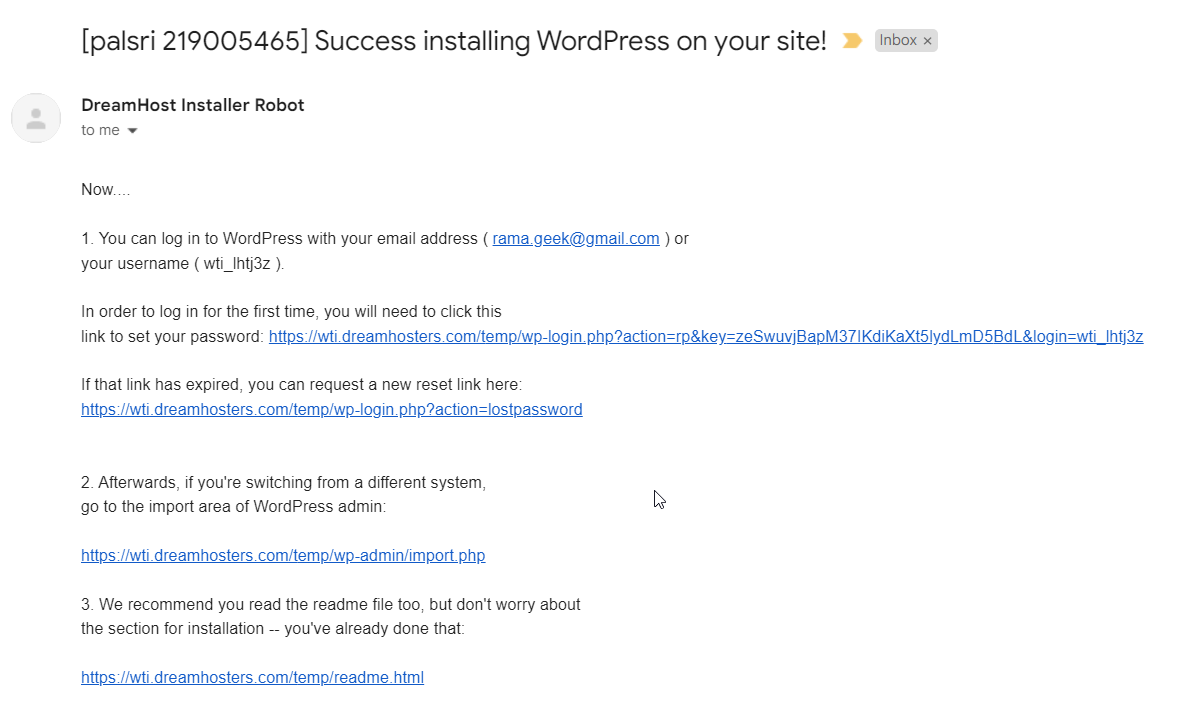
- You should receive a success message. Finally, you will receive an email given in the dreamhost panel login.

- The username and set password details are sent to this email.

Now you can login to your WordPress dashboard through https://www.pallaexamplexxx.com/wp-login.php.
The best DreamHost review can be seen here. It gives the pros and cons of shared plans, custom control panel etc.
It is most easy to install WordPress using the customized script of DreamHost. If you would like to know the db details created during installation, you can go to wp-config.php in the root domain. The root domain would be typically like pallaexamplexxx.com.
