Push notifications have a far reaching effect than email subscription. WordPress sites also provide this feature with and without plugins. But the added advantage of a plugin is the ease you can schedule, send and check analytics.
Mobile and Web Push notifications are possible by subscribing to a service. Free services are there, but have their limitations. Push Engage is one good service which offers higher engagement with your notification with a few clicks on its web service page.
Also Read –
In 2020, most users are using mobile. Push Engage makes it easy to send these push notifications to Windows 10, Windows 7 and Android users. You can segment the users based on country and device type.
Compared to Email campaigns, push notifications have more than 200% click-through-rate. This makes it a more amicable solution to web masters who want to send messages to their audience at an appropriate time. Simply visitors need to subscribe to this service.

There is no need to enter their email, phone number or address to use this service. Once you subscribe, cookies will be installed on your device. At a later time, you can unsubscribe to this service, if you feel they are annoying.
What are Web and Mobile Push Notifications
Push Notifications are small messages sent to mobile and desktop users. They appear as pop-up near the address bar. Once the user clicks it, a webpage or any other form opens based on the web master sent notification.
The user has to accept this notification service to receive messages from the site owner. This is useful when a new post is published. The user is notified in the notifications section of Windows 10 or Android or iOS. This way he can subscribe to the latest updates of the site.
Related Posts
Also, owners can send coupon deals and other discounts through this notification service. The visitor benefits from the latest trends in the industry and also any deals about products of his related category.
Features of Push Engage
Other Great Features
The following are the different premium plans for this push notification service.
- Business
- Premium
- Enterprise
Push Engage – Business Plan Features
- Subscriber Limit – upto 100,000
- Notifications/Month – Unlimited
- Supported Sites – 3
- Smart Opt-in Reminder
- Targeted Opt-in Trigger
- GDPR Compliant
- Custom Segments – 10
- Sub Accounts – 2
- Custom Branding – Yes
- Custom Subdomain – Yes
- Advance Analytics – Yes
- Customer Support – Standard
OneSignal, Pushup, Roost kind of plugins exist to apply web and mobile push notifications. But some of them are difficult to implement, while others are costly.
To send a push notification in OneSignal it is technically little difficult for the average web designer.
But Push Engage Business plan makes it easy to send and schedule notifications with ease.
Push Engage – Dashboard Features
- Notifications
- Create
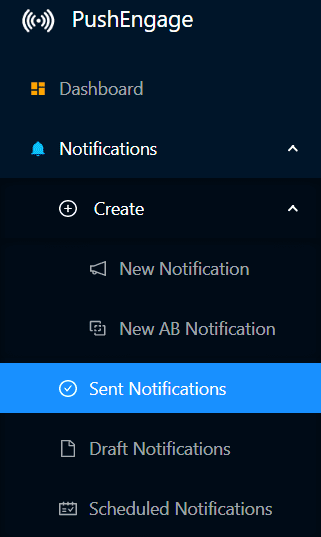
- Sent Notifications
- Draft Notifications
- Scheduled Notifications
- Segmentation
- Automation
- Drip Autoresponder
- Cart Abandonment
- Browse Abandonment
- Trigger Campaign
- Price Drop/Inventory Alert
- RSS Auto Push
- Settings
- Site Settings
- Subscription Settings
- Analytics
- Summary
- Subscriber Statistics
- Subscription Opt-in Analytics
- Billing Management
- Account details
- Subscription details
- Invoices
- Payment Cards
How to Install Push Engage on your WordPress Site
The installation settings for this push notification service are given under “Settings” in the dashboard. On this page, you can enter a site image, site name and site url.
Based upon the website type, you have several options to install the script code.
HTTPS
In 2020, most of the sites are HTTPS based. To install Push Engage on this kind of site, you have to do two things.
- Install Push Engage Script Code
- Include Worker .js file in the root of the site
The following is the typical script code to be included in the HTML section of your site or every page. Most likely it should be included in the header.
<script> window._peq = window._peq || []; window._peq.push(["init"]); </script><script src="https://www.clientcdn.pushengage.com/core/03eexxx-xxxx-xxxx-80d2-079exxxx.js" async></script>
WordPress
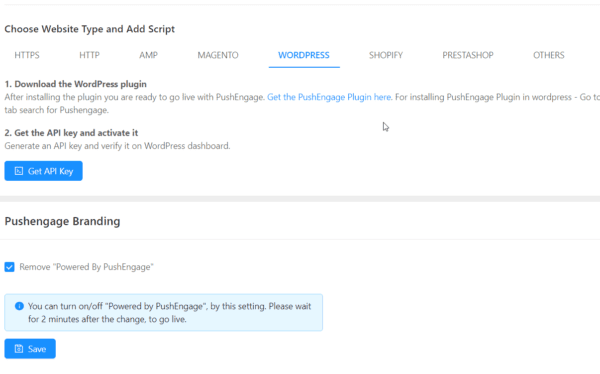
In this section you have an added advantage of removing the branded link of Push Engage.
Just check the option that says “Remove Powered by Push Engage”. This will remove the ad link at the top of the section.
You can also set up welcome notification when somebody subscribes to your push notification. The following details can be changed to your requirement.
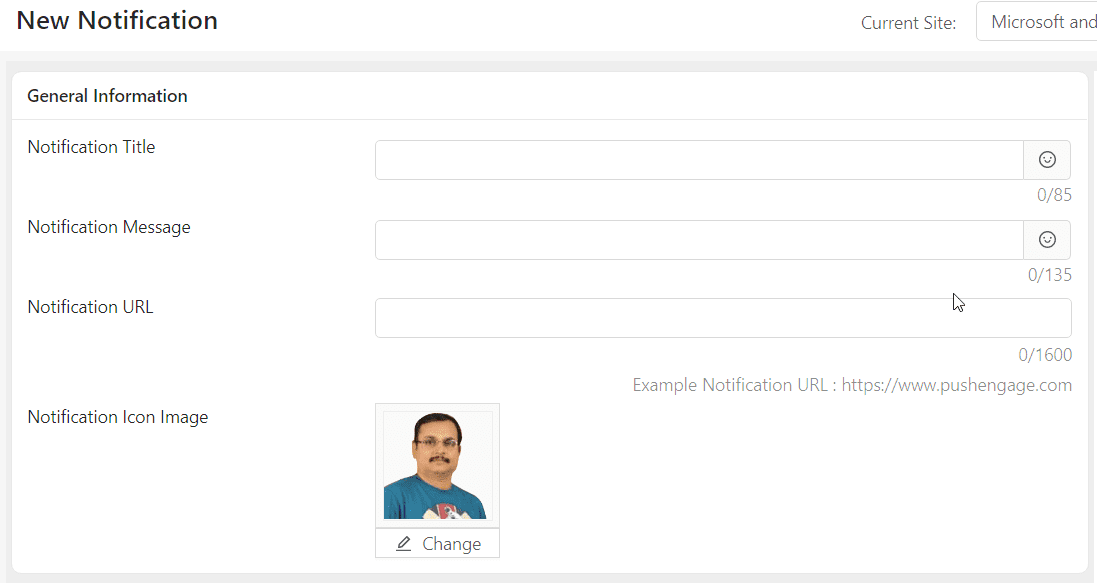
- Notification Title
- … Message
- Notification URL
The default notification setting also can be changed. This is useful for RSS feeds when you write a new post or an automatic notification is sent.
How to Create Web and Mobile Push Notification on WordPress Site
Using the Push Engage service page, you can create a notification. You can send the notification immediately or schedule it for later.
There are various segmentation settings using which you can send the notification to different location users and based on browser usage.
Total Time Needed :
3
Minutes
Total Cost:
29
USD
Video Tutorial
Other Options
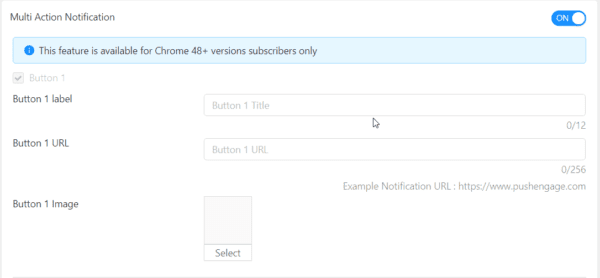
Multi-Action Notification
This feature is available for Chrome 48+ versions and above.
When you enable this option – two buttons are created on the notification message. You can provide the label, url and image.
Notification Large Image
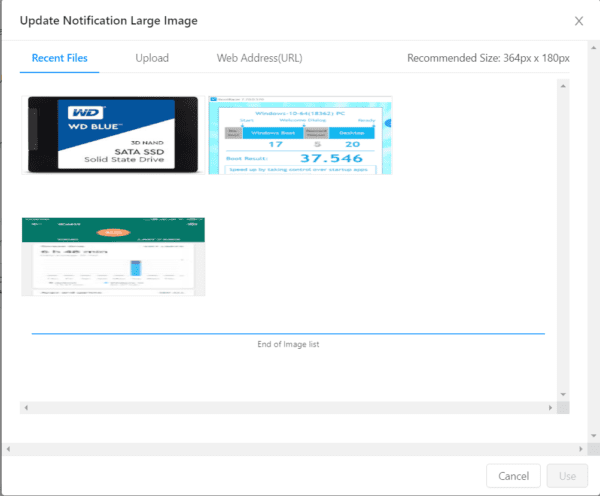
Chrome 56+ supports displaying a large image below the notification’s title and message. This is useful for better conversion and getting the attention of the visitors. The typical image size is 364x180px.
You can “Insert Image” using various options. You can either upload the image or insert the web address of the image. Both are working perfectly.
Notification Duration
This feature is available for Chrome 47 and above. You can keep the notification open until the user interacts with it.
Set the duration until which the notification expires. The maximum duration for which you can keep the notification is 28 days.
This means that the notification will be there in Windows 10, Windows 7, macOS, Android until the user takes action on it. It works on all types of browsers like Chrome, Firefox and Edge.
Add UTM Parameters
In order to check the analytics of your web and mobile push campaign, you can set the UTM parameters. The following parameters can be set – UTM Source, UTM Medium, UTM Campaign, UTM Term, UTM Content.
Scheduling Options
In the Business and higher plans, you can either send the notification immediately or set a later time to send it.
Set the schedule time and date using this option. You can schedule notification in subscriber’s timezone using Premium plan and higher.
If Send Notifications in Subscribers timezone is selected, several scheduled notifications will be created, each in a different timezone of subscribers.
If Send Notifications in Subscribers timezone is selected, and scheduled time is elapsed in subscribers timezone, then notifications will be sent immediately to those subscribers.
Source: pushengage.com
Select Audience
This feature is most useful to tailor your push notifications to the desired audience. Select the date range when the subscription was done.
Once segments are created then you can create rules associated with it. You can include segments with AND/OR rules. Exclude segments with OR conditions.
Geo Location
You can send notifications to selected audiences based on country, state and city. Another useful feature is that you can exclude subscribers from a specific country.
Device Type
Send notifications to subscribers based on desktop or mobile. You can also select browser type as chrome, opera, edge, safari, firefox.
Another optional feature is that you can send the push notification to a set of sample subscribers. The recipient count should be less than the active subscriber base.
RSS Auto Push
Though RSS has become outdated with the latest messengers and notifications, you can set the RSS feed url in the Automation section.
RSS Auto Push checks for new posts every 10 minutes. When there is a new post published, an automatic push notification is sent.
If more number of posts are published within a span of 30 minutes, a gap of 5 minutes is maintained between each post. Also this feature has some problems behind a CDN cache. So better to implement this feature if you don’t have a CDN.
Analytics
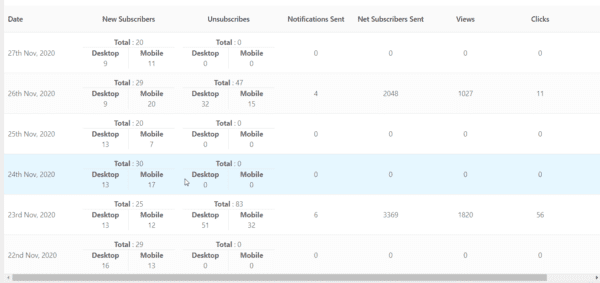
When you click the Summary section, you can see the day-wise details of your subscribers. This can also be based on week and month. Export the data of your subscribers if required. The following details can be seen in this section.
- Date
- New Subscribers
- Unsubscribers
- Notifications sent
- Net Subscribers sent
- Views
- Clicks
Subscriber Statistics
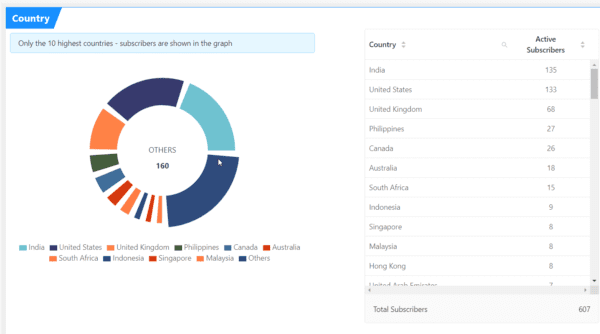
This page will show the graphic and tabular view of your subscribers based on country, browser and device.
Subscriber Opt-in Analytics
This page will tell you the details of how many subscribers have done a purchase or done the required action for your push notification. This is useful to know about the conversions done for your push notification campaigns.

