Most hosting services provide a cPanel or custom control panel. DreamHost file manager is one of the common tools in this large inventory. Once you add a domain and hosting, you are ready to install WordPress. DreamHost service provides one such control panel, where you can access your site files using file/folder management.
Typically ftp clients are used to access these files. But many don’t know that DreamHost also provides in-house tools to manage files and users.
In this DreamHost review we are going to see the details of the File Manager present inside the control panel.
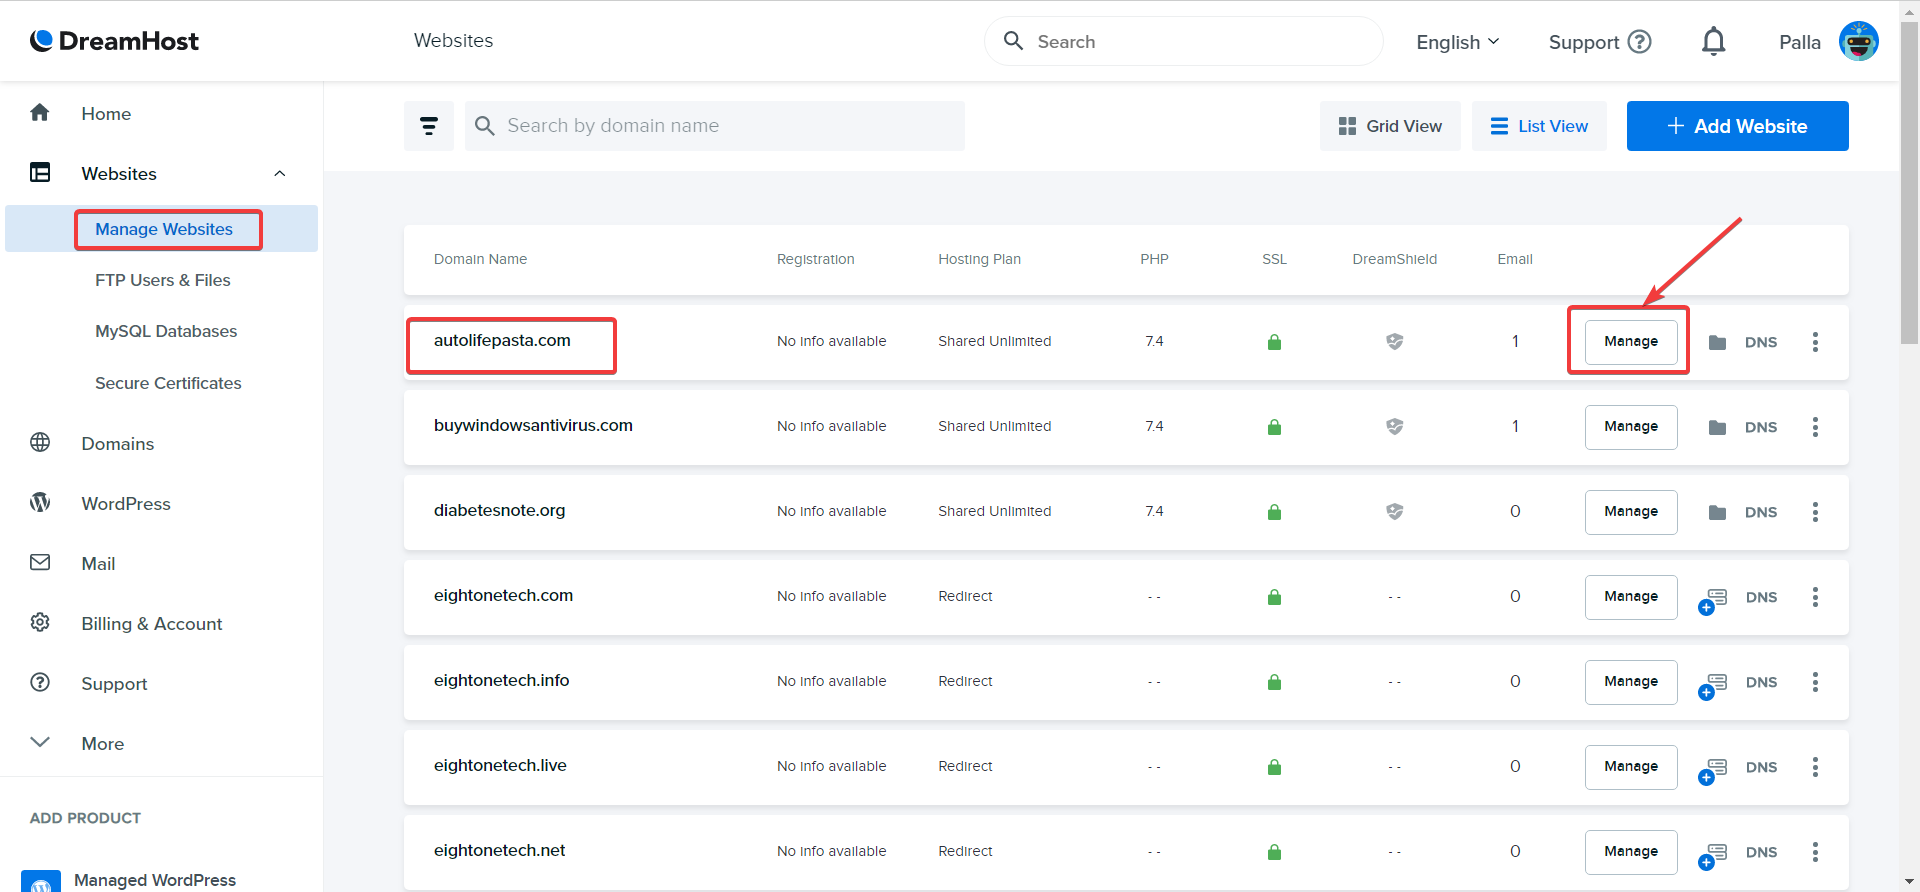
How to Access DreamHost File Manager?
Once you access the DreamHost panel using login credentials, navigate to the following.
There are several ways to do this.
- Websites > Manage websites.
- Against any site, click on Manage.
- Manage your site on the next screen.
- Click on Manage.
All files of your website should be visible. It includes the root directory of the WordPress site.
File Management can also be done using this path
- Websites > FTP Users & Files.
- All users are listed on the right hand side.
- Click on Manage against the user on which your WordPress install resides.
- All files are accessible.
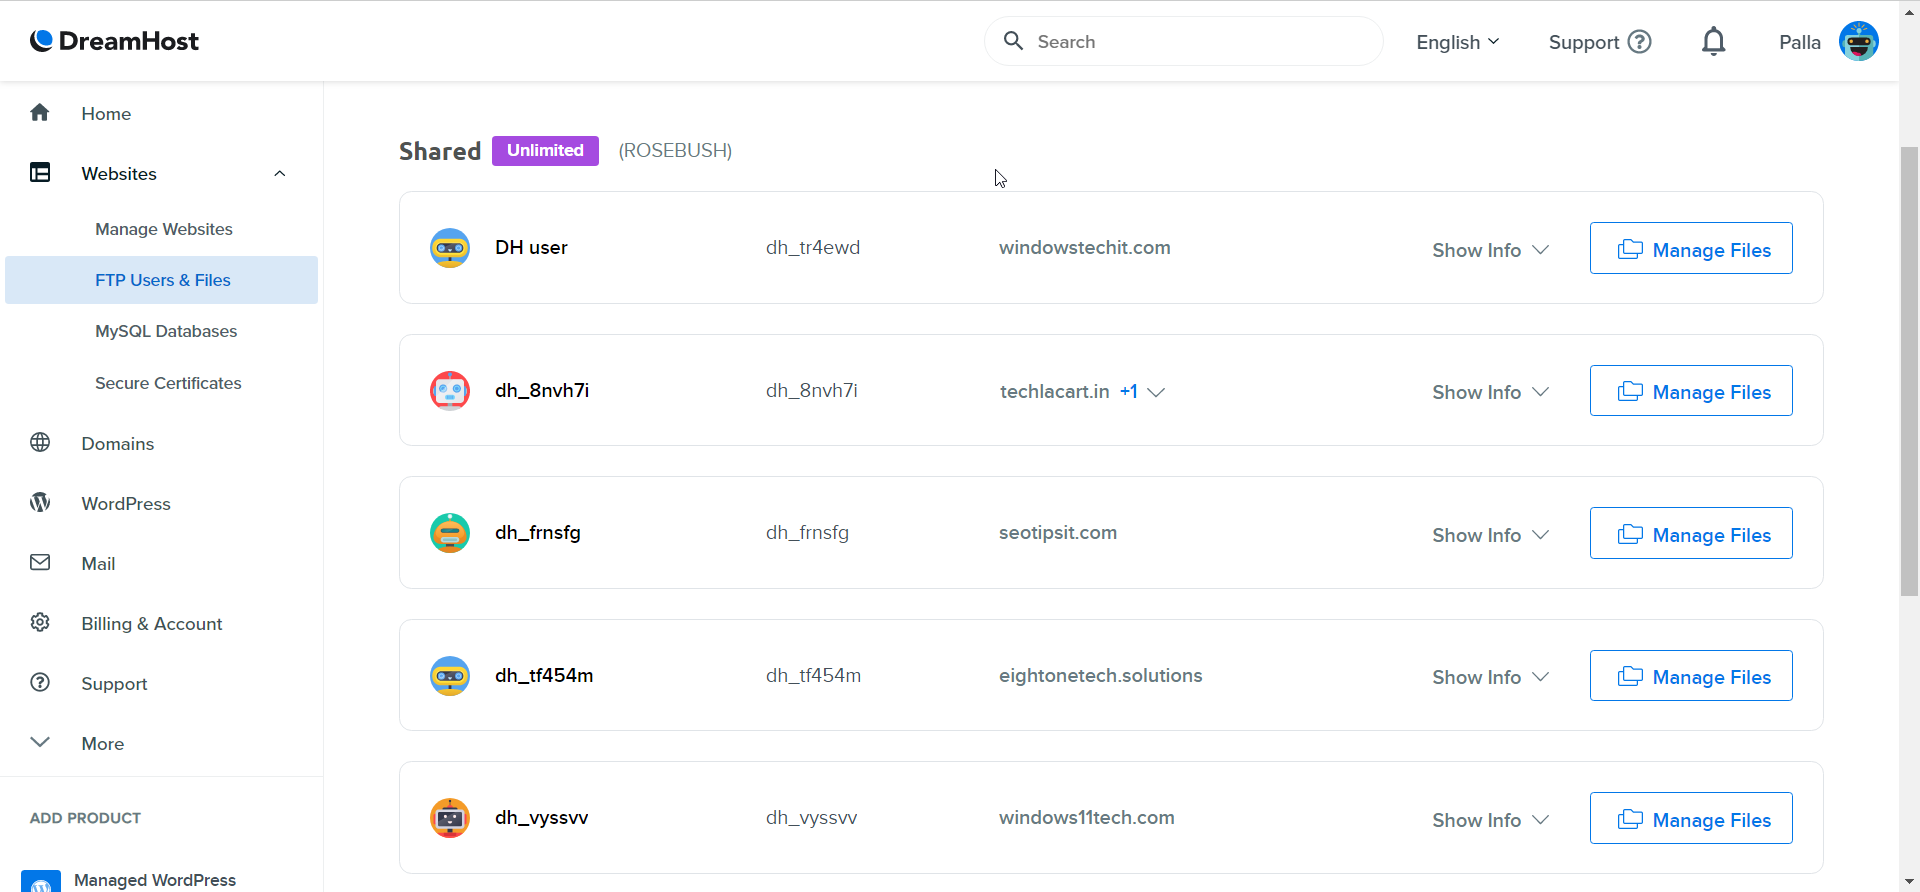
How to Manage Files on DreamHost panel?
Generally some dot files are there in your user account. These are server or host files. You need not tinker with them, apart from a few.
Click the root folder of your WordPress site, for eg. pallaegxx.com. You can access all the WordPress site files.
Extract Compressed File to the User Root Account
If you are looking to transfer WordPress site from one host to another host manually, then you can compress the site folder on the old hosting. Then, download it to your computer and upload to the DreamHost user account root folder.
Right-click the zip file and click on Extract. It will uncompressed the file to the folder content. The WordPress site structure will be the same as your previous hosting account. By default, if you have used the same file name as the domain name, your root folder also will be the same as pallaegxx.com.
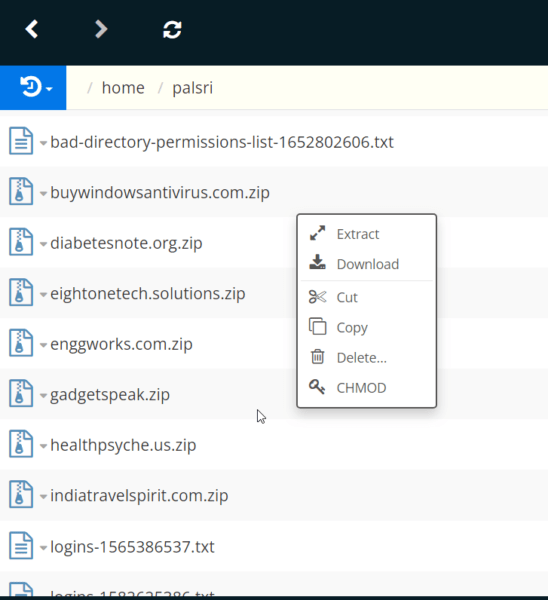
All wp-content, wp-includes, etc kind of folders will be unzipped. You can also see the itsy3789 folder containing the images. It is the most convenient way to transfer WordPress site folders to DreamHost.
DreamHost Review of Extraction
Unfortunately I experienced a very slow state of extraction using the file management system of the control panel. It took a lot of time. Also, there is no provision for compression or zipping the folder on DreamHost Shared Hosting plan. A better alternative is to use HostArmada’s Speed Reaper plan.
Right-click Options
- Download
- Cut
- Copy
- Delete
- CHMOD
File Management options on DreamHost
Few icons are available at the bottom of the screen.
- Upload
- Download
- Fetch File
- Create New File/Folder
- Show Editor
- Cut
- Copy
- Paste
- Delete
- CHMOD
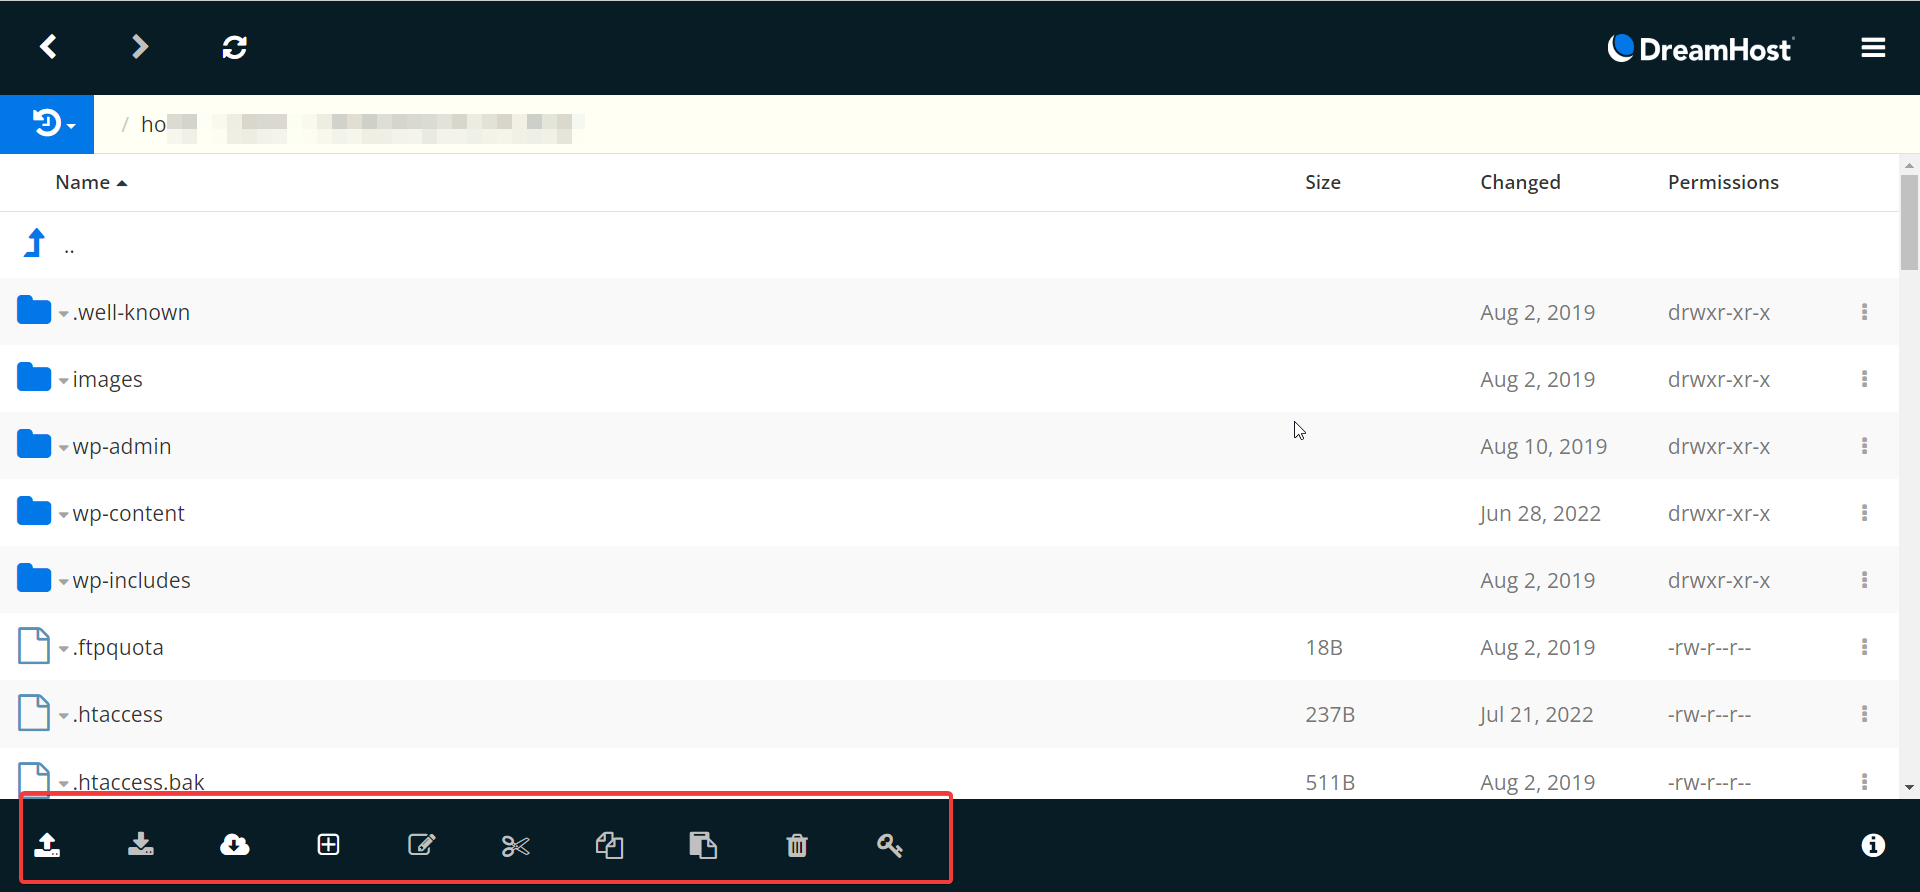
DreamHost Review – File Management Folder Drop-down options
On the left hand-side of each folder in the file management panel, there is an inverted arrow.
If you click that further options are available.
- Open
- Rename
- Properties
These are extra options.
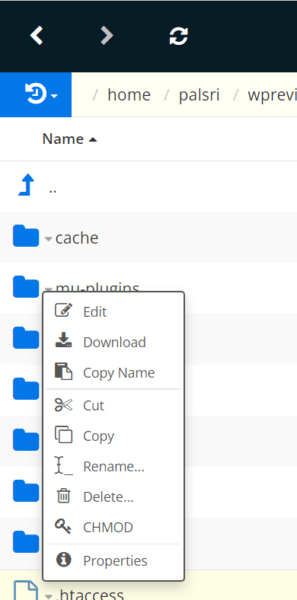
For a typical file, you can also edit it, if it’s possible. It is useful for .htaccess and robots.txt type of files.
For an in-depth DreamHost review and details about pricing, plans, speed, check my guide.

