To transfer SiteGround webmail to another host, you can use mail client (Outlook, Thunderbird, etc). Make sure your email accounts work with SiteGround email hosting. But IMAP is preferred by SiteGround.
Make use of mail client like Outlook and complete SiteGround email migration.
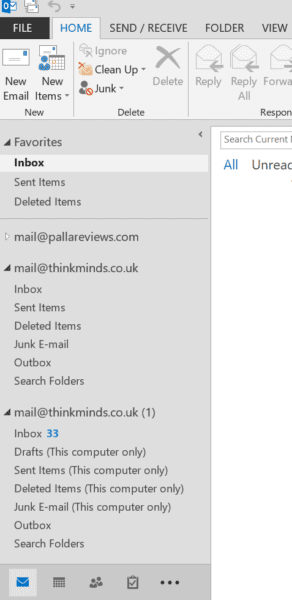
SiteGround email transfer is to drag and drop the Inbox folder in the DreamHost outlook.
You can always create an email account like mail@abcdefgh.com.
Once you have created that account, you might need to migrate it to another host. This may be required for several reasons.
Why Email Account Migration is required in 2022?
Also Read – Why Rocket.net is Best WordPress Hosting in 2021? Simple Features
- Your hosting provider has increased the rate of current plans.
- There is a better host providing quality technical support.
- Email account is full on the current host.
- Transfer of domains and hosting from one host to another.
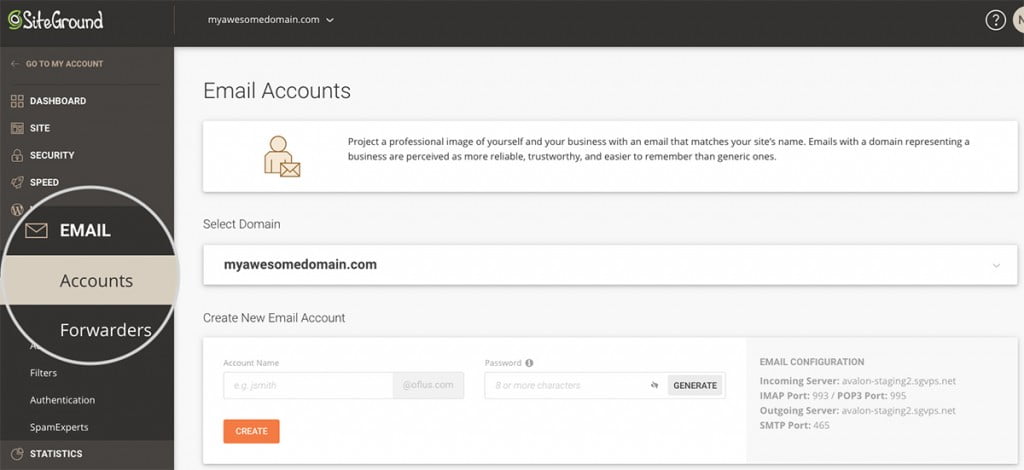
Update – July 2021 – The below screenshots were taken couple of years back. SiteGround has changed the interface by now. The steps are almost the same except for the new pictures.
Also Read – Rocket.net Review – Best Plans and Pricing – Common Features
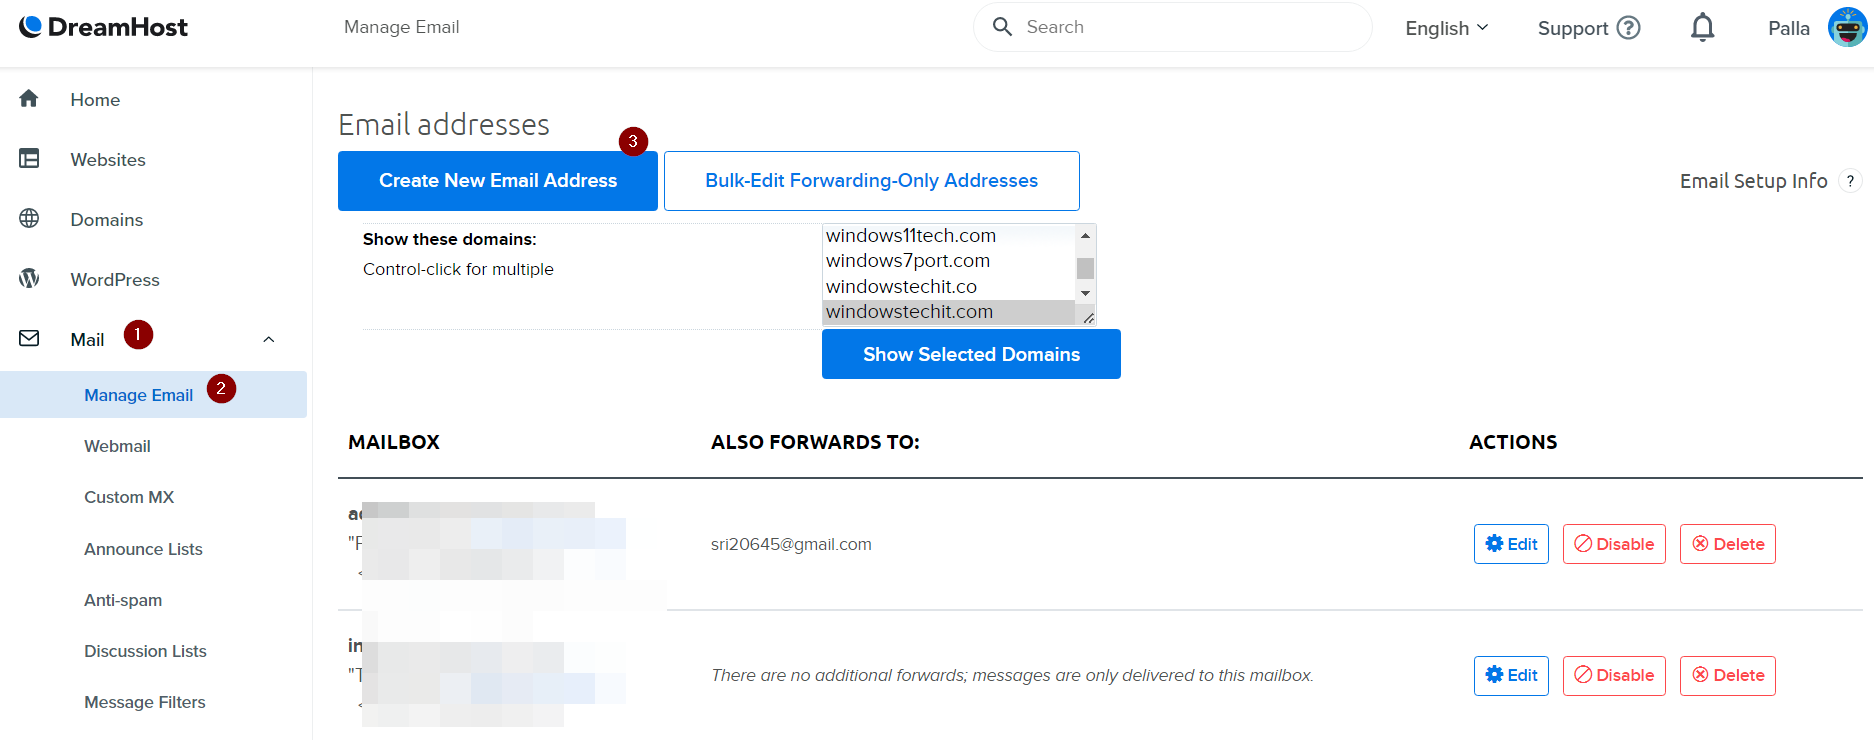
Update – Feb 2022 – The latest screenshots of both the hosting are seen below.
In today’s guide we are going to see SiteGround email migration to DreamHost Email hosting.
Though both SiteGround and DreamHost are preferred partners of self-hosted WordPress platform, I recently moved to the later.
The interface is much cleaner and you have good technical support to. The loading time and speed are better. Basically, it depends on your budget and taste to transfer to DreamHost.
This simple tutorial can be used as a definitive guide to transfer any email account from one hosting to another. SiteGround and DreamHost are just examples. In 2022, the interface of SG is different from earlier years.
How to do SiteGround Email Transfer to Another Host [2022]
- Backup your email account on SiteGround. It makes sure that none of the emails get lost.
- Go to SiteTools > Email > Accounts and create an account with your current email (eg. xyz@customdomain.com).

- Login to DreamHost Control panel dashboard and Mail > Manage Email > Create New Email address. (e.g xyz@customdomain.com).

- Both the email accounts will be same but on different hosting servers.
Now make use of the last step in this guide to complete siteground email migration.
After the transfer is complete, you need to change the domain MX records in your new hosting account. Then you can access them as you would do in SiteGround.
You can see this guide to create a fully hosted email on DreamHost and forward it to another email.
SiteGround Email Hosting Setup – How to Create an Account in 2020 and Earlier
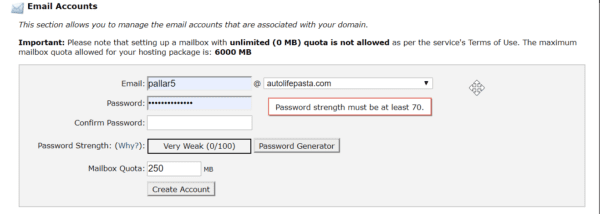
As per GoGeek’s plan you cannot setup a mailbox with unlimited quota. The maximum mailbox quota for this hosting package is 6GB.
- Add your domain to SiteGround’s cPanel.
- Then login to the cPanel of SiteGround with the details provided by your host.
- Then under Mail, you can see Email accounts. Click it. A new page opens.
 To create a new email account you have to enter the following details.
1. Email
2. Select the hosted domain
3. Password
4. Confirm Password
Password strength is displayed. Password generator also exists. A strong password indicates secure encryption. This is indicated in green color.
5. Mailbox Quota

Then click on Create Account
Transfer Siteground Email Hosting to Another
To do this, we are going to use Outlook mail client. I’m using Outlook 2013 version and changes should be the same in other versions like 2016 or 2019 also.
There are 4 stages.
1. Add your Email account using SiteGround credentials.
2. Add the same Email account using DreamHost user details.
3. Select all Mail from your SiteGround Email account in Outlook Inbox.
4. Drag and Drop to the DreamHost account’s Inbox in the same window.
The right email settings for DreamHost are in this guide.
How to Add Siteground Email Accounts in Outlook
1. Open Outlook 2013.
2. File > Add Account
3. Then select “Manual setup or additional server types“.
4. POP or IMAP.
5. Enter the following details
User Information
a. Your Name
b. Email Address – for eg. abc@xyz.com
SiteGround POP3 Settings
a. Account Type – POP3 (for SiteGround)
b. Incoming mail server: as mentioned in your cPanel account for eg. usmXX.siteground.biz
c. Outgoing mail server (SMTP) : same as usmXX.siteground.biz
Logon Information
User name : same email address for eg. abc@xyz.com
Password: the password while creating the email account in SiteGround.
You can check “Remember password“.
SiteGround Email Setup Outlook
Uncheck the option that says “Require logon using Secure Password Authentication (SPA)“. (Just do a trial and error. It depends on the current hosting configuration).
Check whether you account is set up in Outlook, by clicking the button, “Test account settings“. You can uncheck the option “Automatically test account settings when Next is clicked“.
You should now see a green tick mark that you can logon to SiteGround mail server from Outlook. Then click “Next“.
Email account is added to Outlook and all your Inbox mail is downloaded to your local computer.
Siteground Email Migration
If your mail is not yet downloaded to the SiteGround email account. You can click on “Send/Receive All Folders” in the SEND/RECEIVE tab of Outlook.
All your email should download. Then select all email in the Inbox by pressing Ctrl + A in Windows. Then you can drag and drop them in DreamHost account.

Note: If you have other folders, then drag and drop each folder, instead of doing all at once.
As a cross-check you can count the number of email messages in either hosting account. In that way you could make sure that all the emails have been transferred. In case of any failure, you can always use the backup you created earlier in SiteGround hosting.
As we can see above, both the email accounts are the same. Don’t confuse yourself! Since we are migrating the same email account, it is necessary. Otherwise, you can give a different name in your email client to remember the hosting servers.
If you would like to transfer email from another host to SiteGround, you can follow the tutorial. It is just a reverse process of what we did till now.
