Assuming you have already installed WordPress on your hosting account, the next thing you need to do is set up your email account.
This is necessary in order to receive notifications from WordPress, as well as to allow other people to contact you through your WordPress website.
In General settings, you can add your administrator email. So, you will get notifications from WordPress for security and plugin updates.
But if you want to use the same address to send emails to different users on WordPress, they are different ways.
There are two ways to set up your email account in WordPress.
The first is to use an external service such as Gmail, Yahoo Mail, or Hotmail.
To do this, you will need to create an account with one of these services and then add the details of that account to your WordPress settings.
The second way to set up your email account in WordPress is to use an email client such as Microsoft Outlook, Mozilla Thunderbird, or Apple Mail.
To do this, you will need to install the software on your computer and then add the details of that account to your WordPress settings.
In this tutorial we are going to see WordPress Email Settings for outgoing email, SMTP, Gmail, Office 365, SiteGround and WooCommerce.
Related
- Create and Restore DreamHost Backup WordPress Easily
- How to Lock Invalid Usernames from BruteForce Attacks in WordPress
- QUIC Cloud – Review on CDN Settings | Pricing | WordPress

WordPress Not Sending Email
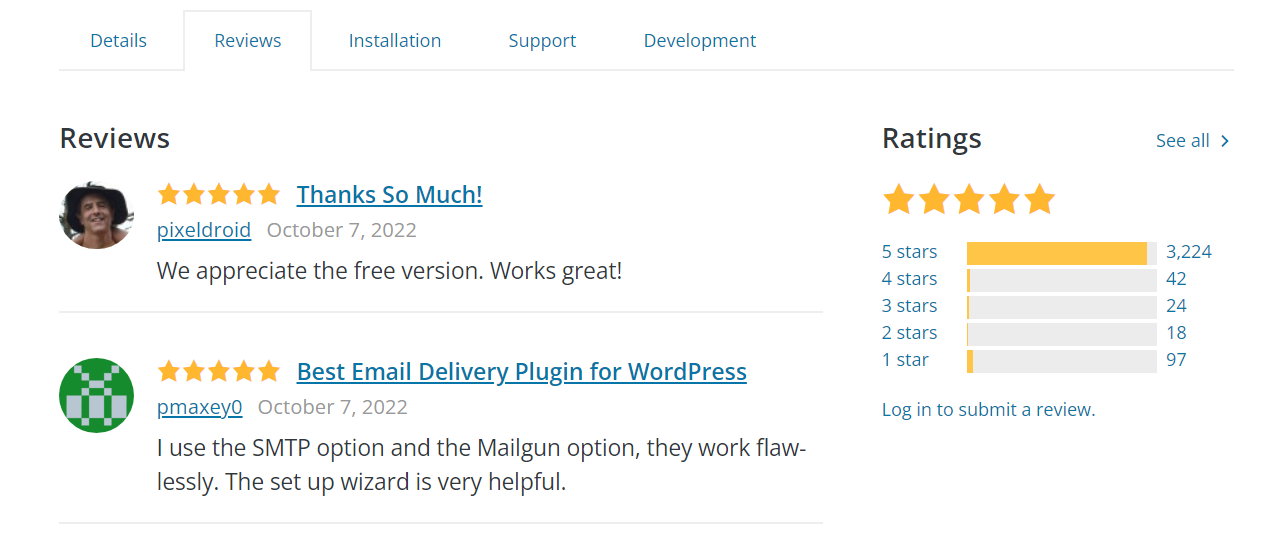
If you are not receiving email from WordPress, the first thing you need to do is check your email account to see if the messages are in your spam folder.
If they are, be sure to mark them as “Not spam” so that future messages from WordPress will go to your inbox.
If you can’t find the messages in your spam folder, the next thing you should do is check your WordPress settings to make sure you have the correct email address entered for the administrator account.
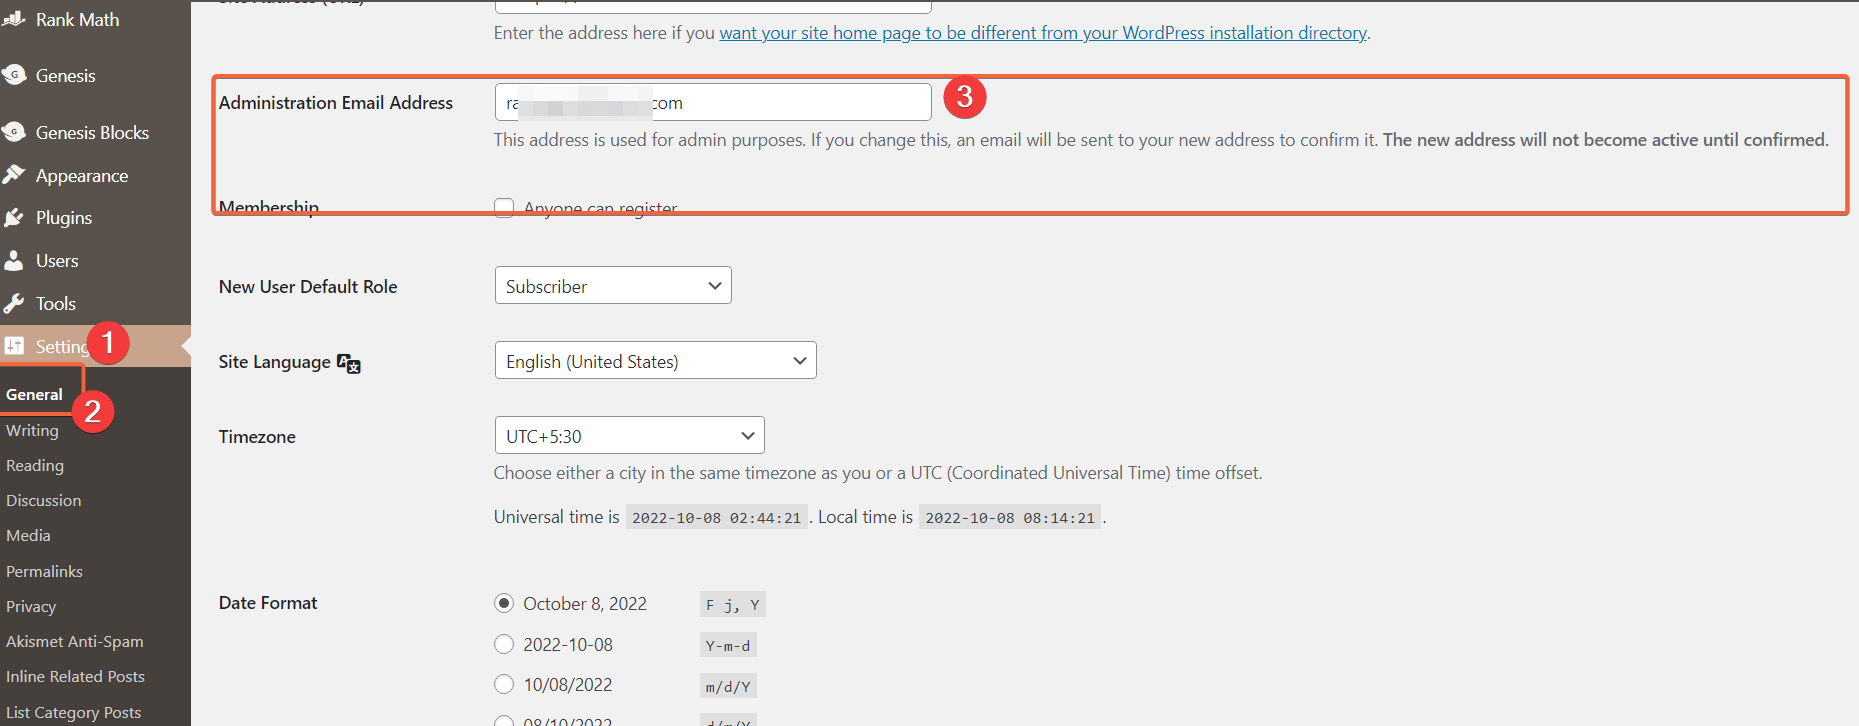
To do this, log into your WordPress Dashboard and go to Settings > General.
The email address field should contain the address where you want to receive messages from WordPress.
If you have verified that the address is correct and you are still not receiving messages, it is possible that your hosting provider is blocking outgoing mail from your website.
You will need to contact them and ask them to whitelist the IP address of your website.
Where are email settings in WordPress?
You can use a SMTP plugin like Post SMTP or Easy WP SMTP to install the email settings in WordPress. Configure the settings and you should be good to send mails from WordPress. Most of the plugins have sender details, mail settings and SMTP options. You can also enable encryption and choose the right server, port. These settings are available on the left hand side of WordPress panel.
What SMTP server does WordPress use?
The typical SMTP server used by WordPress is the host’s service. It could be mail.exampledomain.com or mail.hostname.com. The common SMTP port is 465, including encryption. Most of the times, the incoming server settings are used for SMTP or outgoing WordPress email settings. Generally, the PHP mail function is used by WordPress to send mails. SMTP server uses the Ports 25, 465, 587, or 2525 for SMTP, but only 587 or 2525 really should be considered for modern use.
Related
- LiteSpeed Cache vs. WP Rocket – Which is better in Performance?
- LiteSpeed Cache + QUIC.cloud – Speed Up WordPress Site Performance
- LiteSpeed Cache Review – Boost Performance and Instantly Improve Speed
WordPress Email Settings SMTP
To configure the WordPress email settings, you need to have an SMTP server.
You can either use your hosting provider’s SMTP server or a third-party SMTP service.
Check our WordPress hosting review, that will such of the best hosting companies.
If you use a third-party SMTP service, you need to enter the SMTP credentials in the WordPress email settings.
In WordPress configure SMTP without plugin, you need to add the following code to the wp-config.php file:
General SMTP code for WordPress Email
define('WPMS_ON', true);
define('WPMS_SMTP_PASS', 'your-smtp-password');
define('WPMS_SMTP_USER', 'your-smtp-username');
define('WPMS_SMTP_HOST', 'your-smtp-host');
define('WPMS_SMTP_PORT', '465');
define('WPMS_SSL', true);
If you use Gmail’s SMTP server, you need to enter the following values:
Gmail SMTP code
define('WPMS_ON', true);
define('WPMS_SMTP_PASS', 'your-gmail-password');
define('WPMS_SMTP_USER', 'your-gmail-address');
define('WPMS_SMTP_HOST', 'smtp.gmail.com'); //add subdomain if needed -- ssl://smtp.gmail.com OR tls://smtp.gmail.com -- 587 Port is default for TLS 465 Port is default for SSL //587 Port is default for TLS 465 Port is default for SSL check with your provider if other port needed ex: 2525 - hotmail require 25 port number instead of 587
After adding these lines of code, save the wp-config.php file and test the WordPress email settings by sending a test email.
In case you have slow wordpress admin panel problem after configuration, you can check our solution guide.
WordPress Email Settings Outlook
If you’re using Outlook as your email service and you’re having trouble sending or receiving email from WordPress, it’s likely due to a few simple settings.
By changing a few settings in your WordPress account, you can optimize it to work better with Outlook.

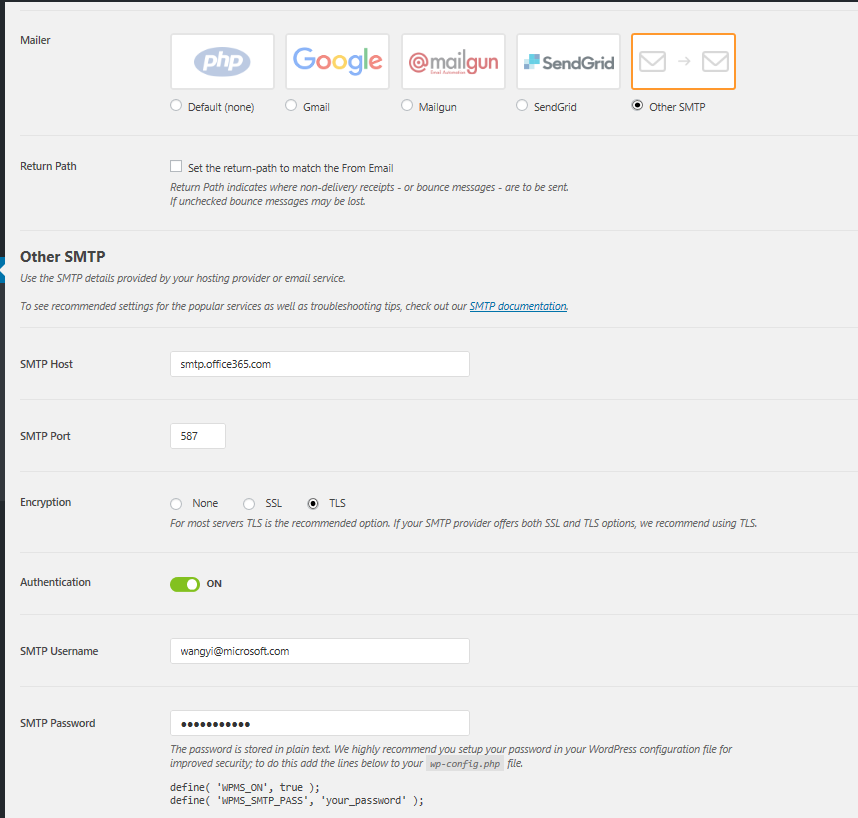
To start, log in to your WordPress account and navigate to the “Settings” tab. From there, select the “Email” option. In the “Outgoing Email Settings” section, enter the following information:- SMTP Host: smtp-mail.outlook.com
- SMTP Port: 587
- Encryption Type: TLS
- Authentication: Yes
- Username: Your full Outlook email address
- Password: Your Outlook password
WordPress Email Settings Office 365
If you have a WordPress website and want to use Office 365 for your email, you may have run into some difficulties configuring the two together. Although it’s not difficult to do, there are a few steps involved in getting WordPress and Office 365 to play nice with each other.
In order to set up WordPress to use your Office 365 email, you’ll need to configure the WP Mail SMTP plugin. This plugin allows you to send emails from your WordPress site using any SMTP provider, including Office 365. Once you’ve installed and activated the plugin, head over to the WP Mail SMTP settings page.
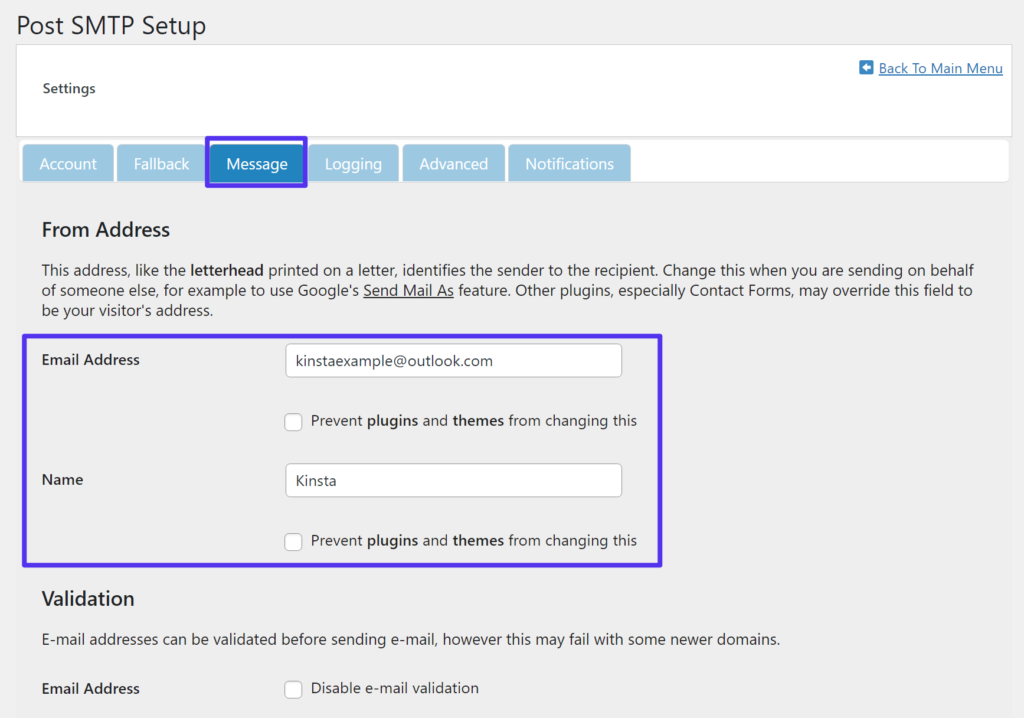
On the General Settings tab, you’ll need to enter in your From Email and From Name. This is the email address and name that will be shown when someone receives an email from your WordPress site. Next, you’ll need to select Office 365 from the Mailer dropdown menu.
Under the OAuth section, check the box next to Enable OAuth Settings. OAuth is a authentication protocol that allows third-party applications (like WP Mail SMTP) to access Office 365 account data without having direct login credentials. After Enable OAuth Settings is checked, click on the Get Your Credentials link.
A new page will open up in your default browser asking you to log in with your Microsoft account associated with Office 365. Once you’ve logged in, grant WP Mail SMTP permission to access your account data by clicking on the Allow button.
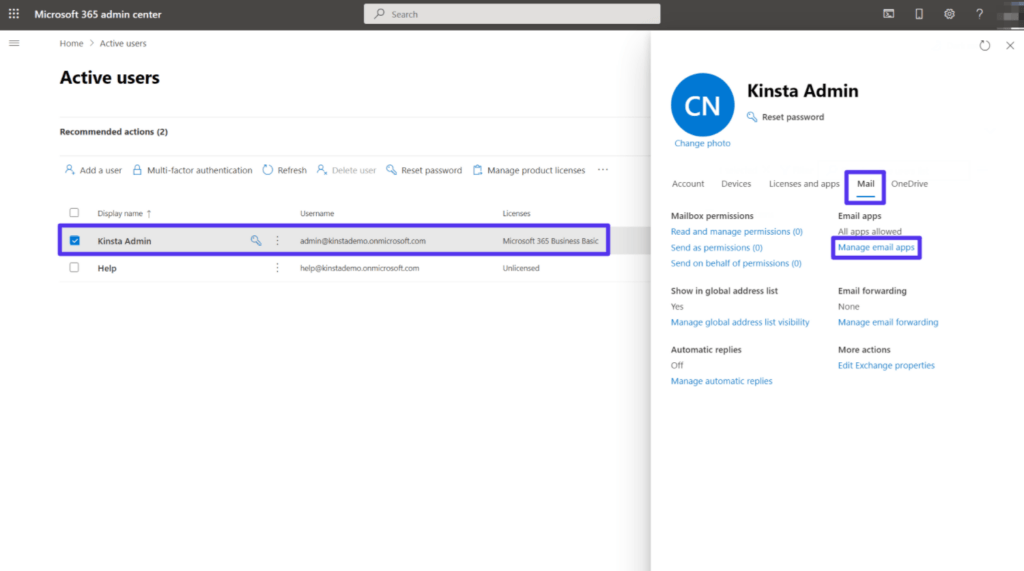
You should now see a page with your OAuth credentials. Copy and paste these into the appropriate fields on the WP Mail SMTP settings page back in your WordPress dashboard and click on Save Changes.
That’s it! You’ve now successfully configured WordPress to use Office 365 for all outgoing email communication.
WordPress Email Settings Gmail
Assuming you are using the default WordPress email system, you will need to change the settings to use Gmail SMTP.
The first thing you need to do is install and activate the WP Mail SMTP plugin.
Upon activation, you need to visit Settings » WP Mail SMTP page to configure the plugin.
First, you need to provide your From Email and Name. This is the email address and name that will be used when an email is sent from your WordPress site.
Next, you need to select the type of mailer that you want to use. For most cases, select ‘Send all WordPress emails via SMTP’ option.
Now scroll down a little bit and see the section labeled ‘Outgoing Mail Settings’. You need to enter your Gmail address in the ‘From Email’ field and your name in the ‘From Name’ field.
After that, enter smtp.gmail.com in the ‘SMTP Host’ field and 465 in the ‘SMTP Port’ field. Select SSL from the ‘Encryption’ dropdown menu. Lastly, enter your Gmail username in the ‘Authentication Label’ field and password in next field below it.
SiteGround SMTP Settings
To use SiteGround Email Service on your WordPress site, you need to adjust the email settings in your WordPress admin panel. For that, you need to edit the wp-config.php file and add the following lines:
/**
* SiteGround Email Service Settings
*/
define( 'SG_IMAP', 'imap.siteground.com' );
define( 'SG_POP3', 'pop3.siteground.com' );
define( 'SG_SMTP', 'smtp.siteground.com' );
Now you can go to Settings -> Emails and enter these values for Incoming Mail Server and Outgoing Mail Server. The default ports are 993 for IMAP, 110 for POP3, and 587 for SMTP.
WooCommerce SMTP settings
When it comes to improving your WooCommerce email deliverability, one of the best things you can do is set up WordPress SMTP (Simple Mail Transfer Protocol).
This involves using a third-party SMTP provider to send your WooCommerce emails.
While there are a number of different SMTP providers available, we recommend using an established provider like SendGrid, Mailgun, or Amazon SES.
These services will provide you with the necessary credentials to set up your WordPress SMTP settings.
Once you have signed up for an account with one of these providers, you will need to install and activate the WP Mail SMTP plugin. For more information on how to do this, please see our article on how to install a WordPress plugin.
Upon activation, you will need to visit the WP Mail SMTP » Settings page to configure the plugin settings.
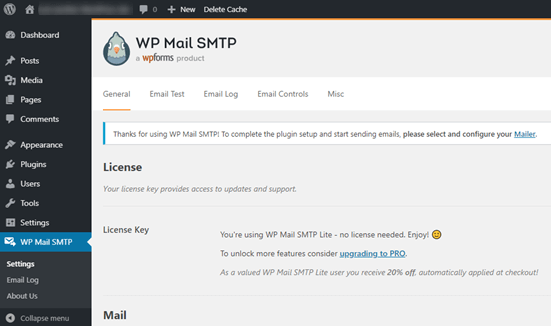
First, you will need to provide your From Email and From Name. This is the email address and name that will be used when sending WooCommerce emails from your WordPress site.
You will then need to select one of the four available mailer options.
The first two options (SendGrid and Mailgun) require that you have an account with the respective service in order to use them. If you do not have an account, we recommend using the third option (Amazon SES).
The fourth option is for advanced users who wish to use their own custom mailer setup.
If this is something that interests you, we recommend consulting with a developer before proceeding.
Once you have selected a mailer option, you will be prompted to provide additional info depending on which mailer option you selected:
• If you selected SendGrid: Enter your SendGrid API Key.
• If you selected Mailgun: Enter your domain name and API key.
• If You Selected Amazon SES: Enter your Amazon SES API Key and Secret Key.
• If You Selected Other SMTP: Enter the details for your custom SMTP server including the hostname, port number, encryption type, and authentication type.
You can also choose whether or not to enable return path support by checking the box next to “Enable Return Path“.
Checking this box will help improve email deliverability by bouncing back undeliverable messages so that they can be fixed before being resent.
The final step is to click on the “Save Changes” button at the bottom of the page to save your settings
